A take-off(or quantity take-off) is the process of measuring the quantities of work from a set of drawings — the lengths, areas and counts a bill of quantities is built on. For decades that meant a scale rule, a printed drawing and a take-off pad. Today drawings arrive as PDFs. In Corbel you start by letting it read what the drawing already states — schedules, room areas, the scale — then measure on screen only what it doesn't, with every quantity feeding the bill of quantities.
This guide follows the real Corbel flow end to end — upload, analyse and confirm, measure the rest, price — and clears up a common misconception about where you start.
What is a PDF take-off?
Instead of measuring on paper, you upload the drawing PDF, calibrate it so Corbel knows the real-world scale, then draw whatever the drawing doesn't state directly on the page with the take-off tools. Each length, area or count you draw is captured as a quantity in the correct unit — metres, square metres, cubic metres or number.
The shift from paper isn't only speed. Because every measurement is a live object tied to a Condition— a type of work like "230mm external wall" — it can roll up across pages and flow into the bill, with nothing re-keyed.
Before you start
You need very little up front:
- The drawing PDF— plans, sections and details for what you're measuring.
- A known dimension on each sheet— a printed scale bar or a figured grid dimension (say a 5 000 mm grid line) to calibrate against. Never trust the stated "1:100" on a PDF that may have been resized.
Optionally, set up your rate library under Assemblies— load the SA starter library or import a price list. That's the only thing worth doing ahead of time, and even it can wait until you're pricing: as you measure, each item links to a Condition, and on the Materials tab those Conditions pick up their materials and rates from a recipe in that library.
Step by step
Start with a project of your own and a drawing you're actually pricing:
Create a project and upload the drawing
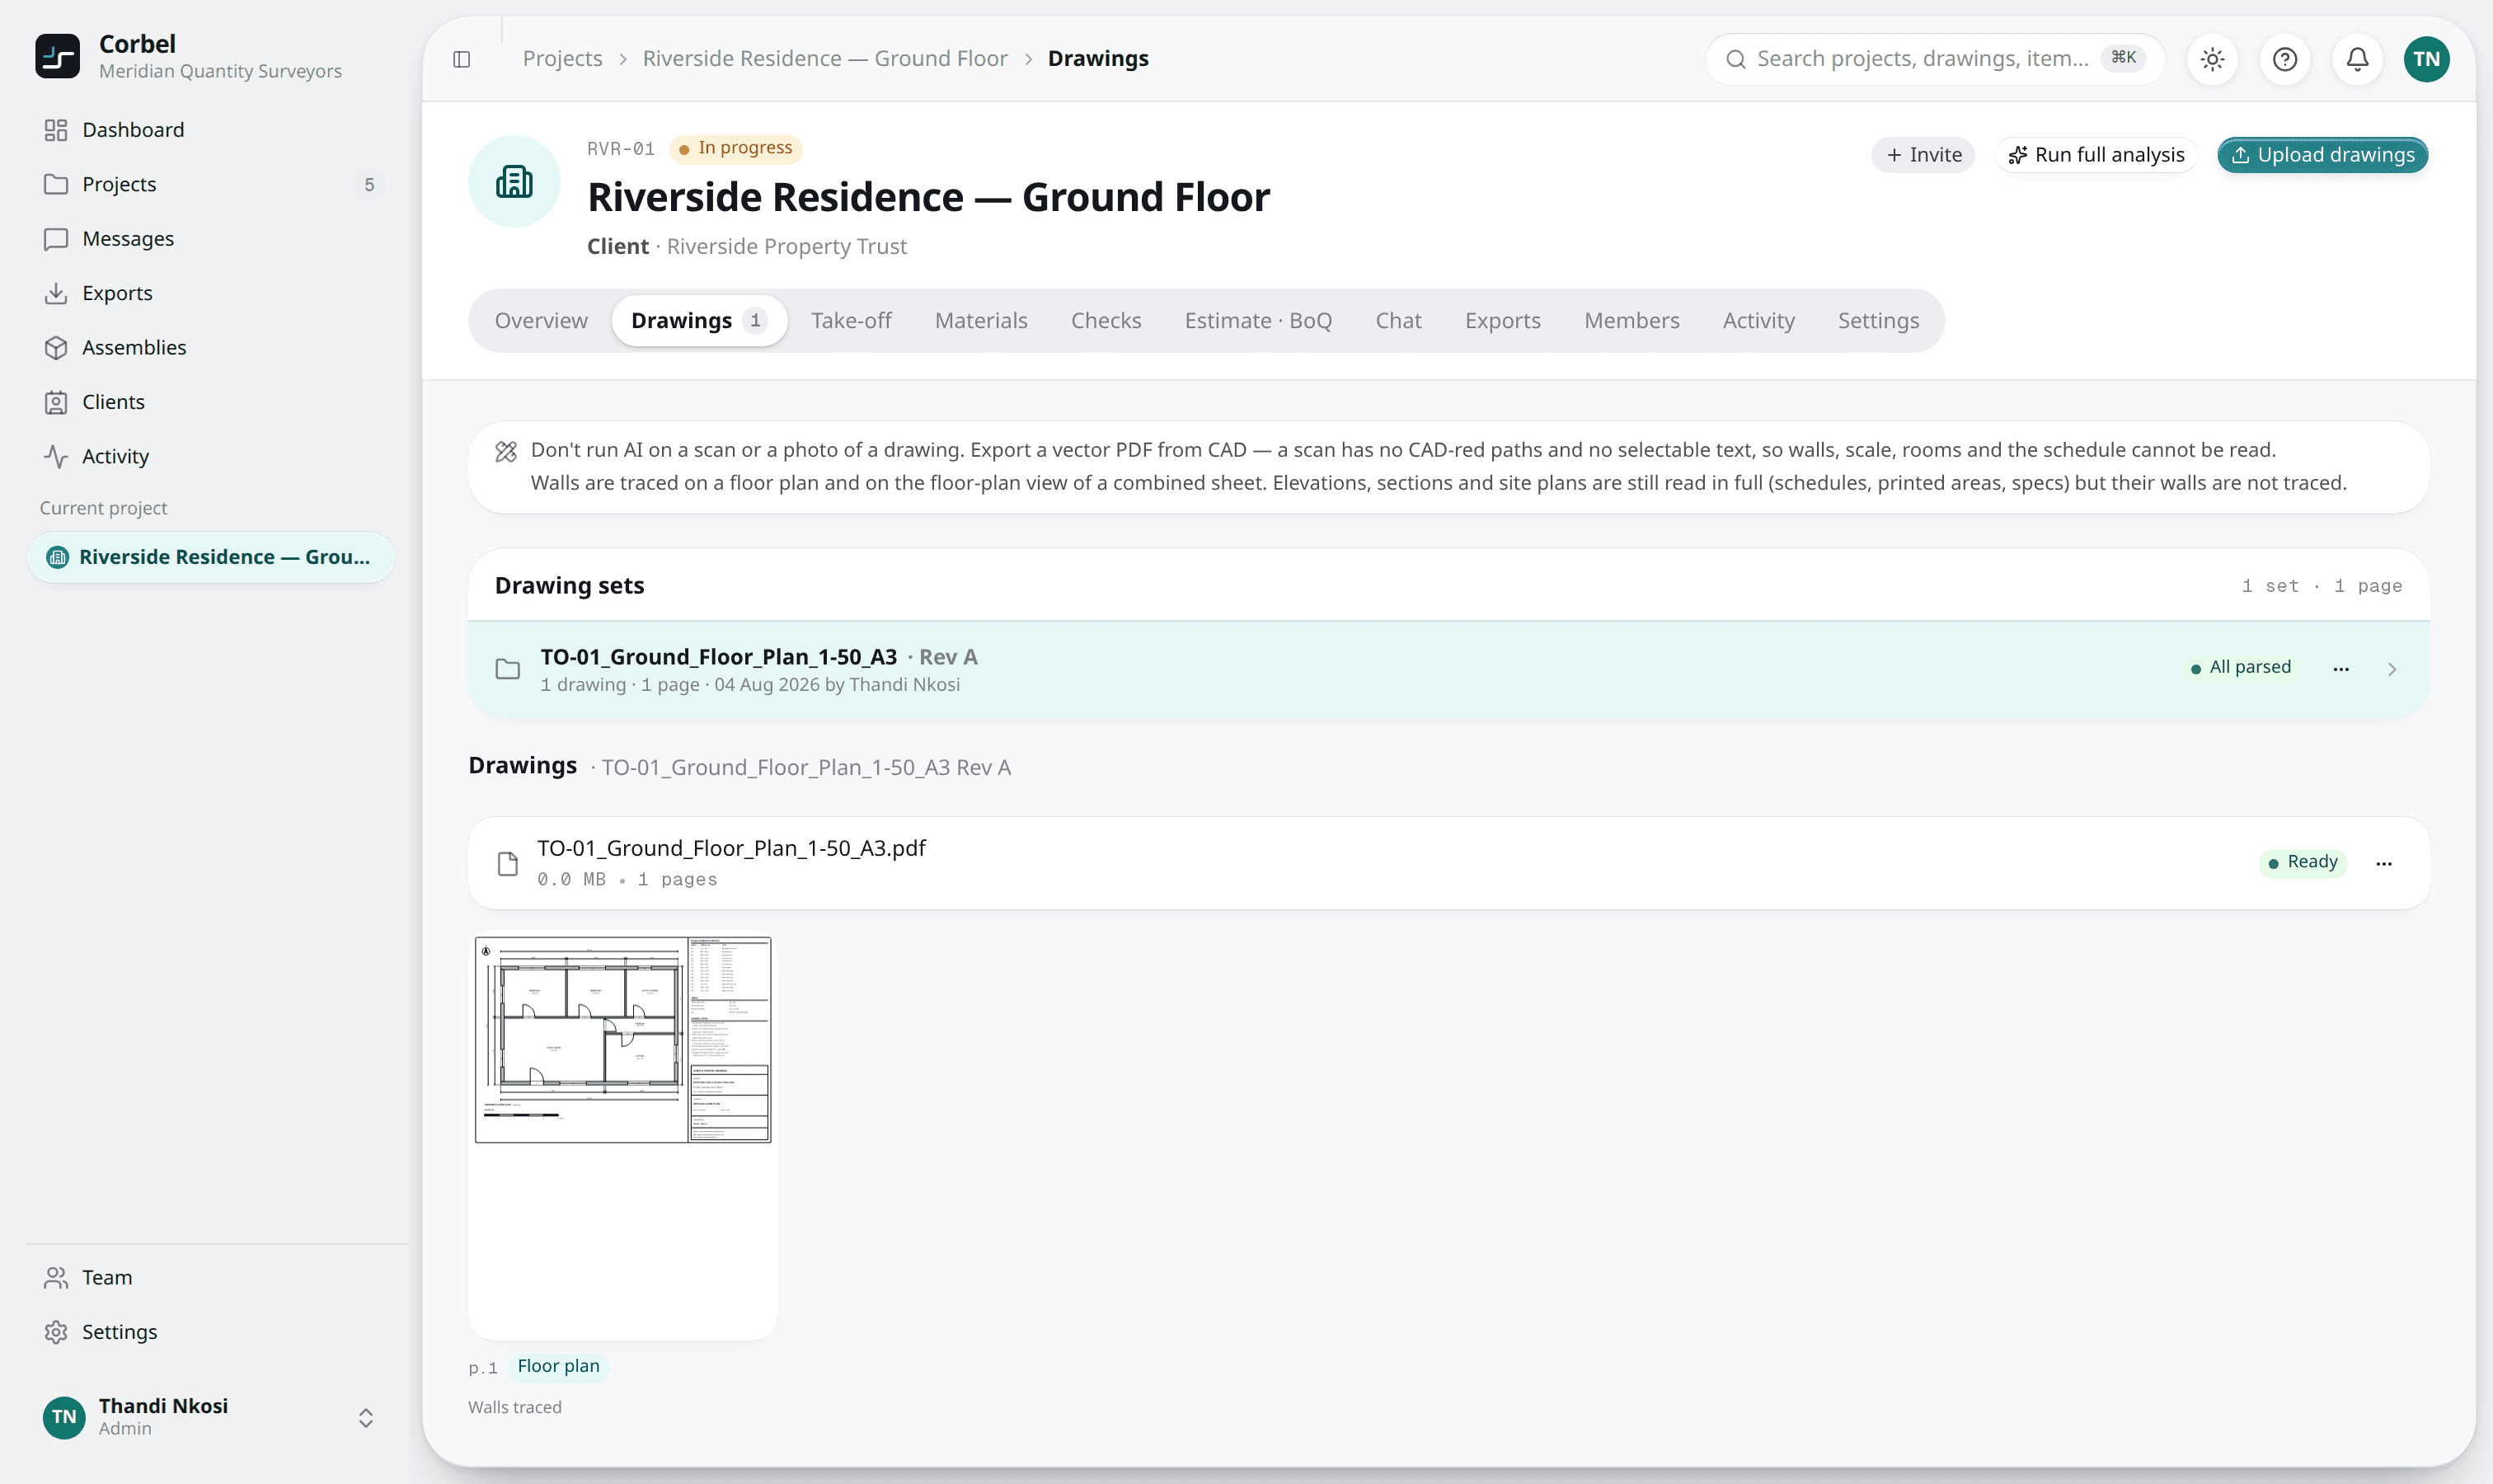
Add a project, then upload the PDF. Corbel turns the file into pages you can open in the take-off viewer.
Analyse — let Corbel read the drawing
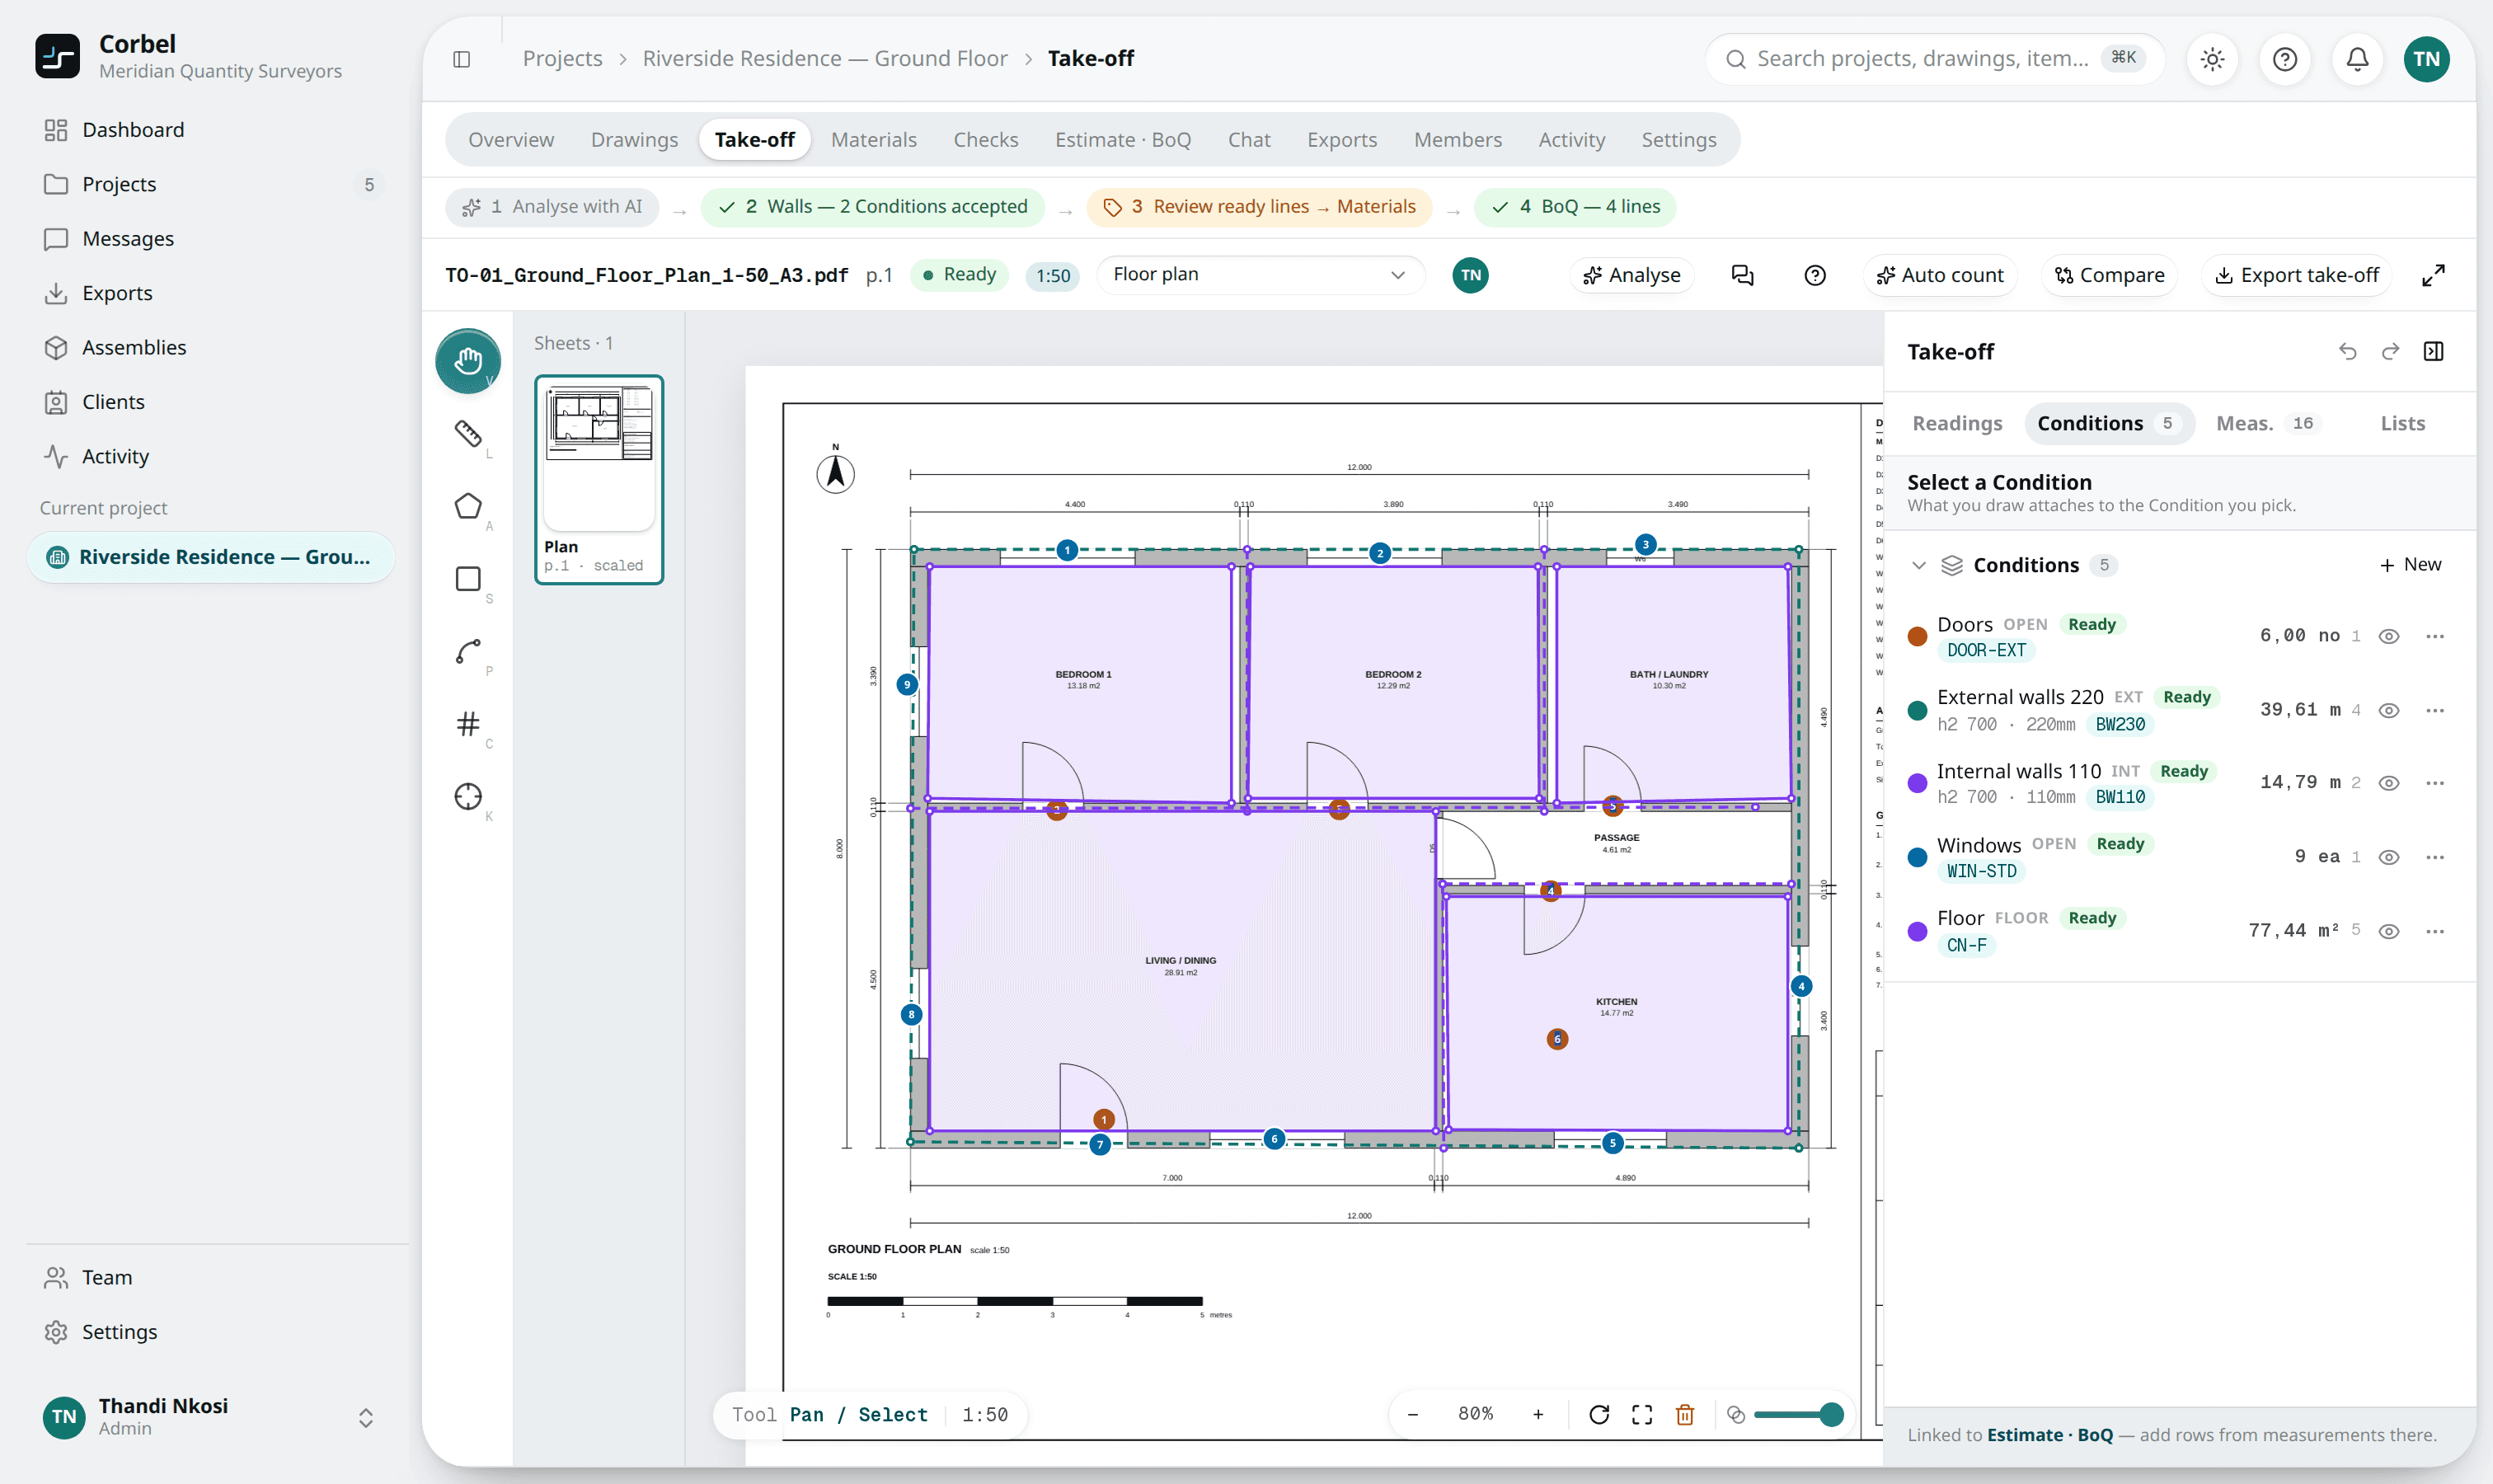
Run Analyse. Corbel reads the door and window schedule, the printed room areas, the spec notes and the printed scale, and traces plan walls drawn in CAD-red masonry. Scans work too: Corbel reads the room areas, the schedule and the scale off the print, but walls are only traced from a CAD vector PDF, so on a scan you draw them yourself. Every reading arrives as a suggestion: accept what's right, reject what isn't — nothing counts until you do.
Calibrate the scale (press K)
Accepting the printed scale calibrates the page. No printed scale, or want to check it? Pick the Calibrate tool (hotkey
K), click the two ends of a known dimension and type its real length and unit (mm, cm or m). This is the one step you can't skip — measuring tools stay disabled until the page is calibrated.Measure what the drawing doesn't state
Use Length (
L) for linear work, Area (A) for surfaces, Polyline (P) for irregular runs, and Count (C) for items like doors. Draw walls the analysis didn't trace, outline slabs, count anything not on a schedule. Finish an area or polyline with Enter; every Count click adds one.Create a Condition (or let the setup wizard make one)
Measurements attach to a Condition— a work type like "230mm external wall". You can add your own (name it and pick a type), or just start drawing and the setup wizardasks for the wall's height and thickness. Set it once and every measurement on that Condition inherits it. Pricing comes later, on the Materials tab — measuring and pricing stay separate.
Review the roll-ups
Quantities accumulate per Condition and across every page. Sanity-check the totals as you go — a wall that should be ~40 m shouldn't read 400.
Getting accurate quantities
A take-off is only as good as its inputs. A few habits keep yours reliable:
For walls with doors and windows, use the Area tool's deduction mode to subtract openings — Corbel handles the deduction on the ASAQS net-wall convention. Work one trade or element at a time and lean on Conditions so identical items are measured the same way every time; consistent Conditions are what make a take-off auditable later.
From quantities to a priced bill
This is where it pays off. Your accepted and measured quantities don't just sit in a register — they flow into the bill:
- The Materials tab turns what you accepted into ready lines, each with a rate from your library, plus a material schedule and an openings schedule — and offers a one-click Draft BoQ.
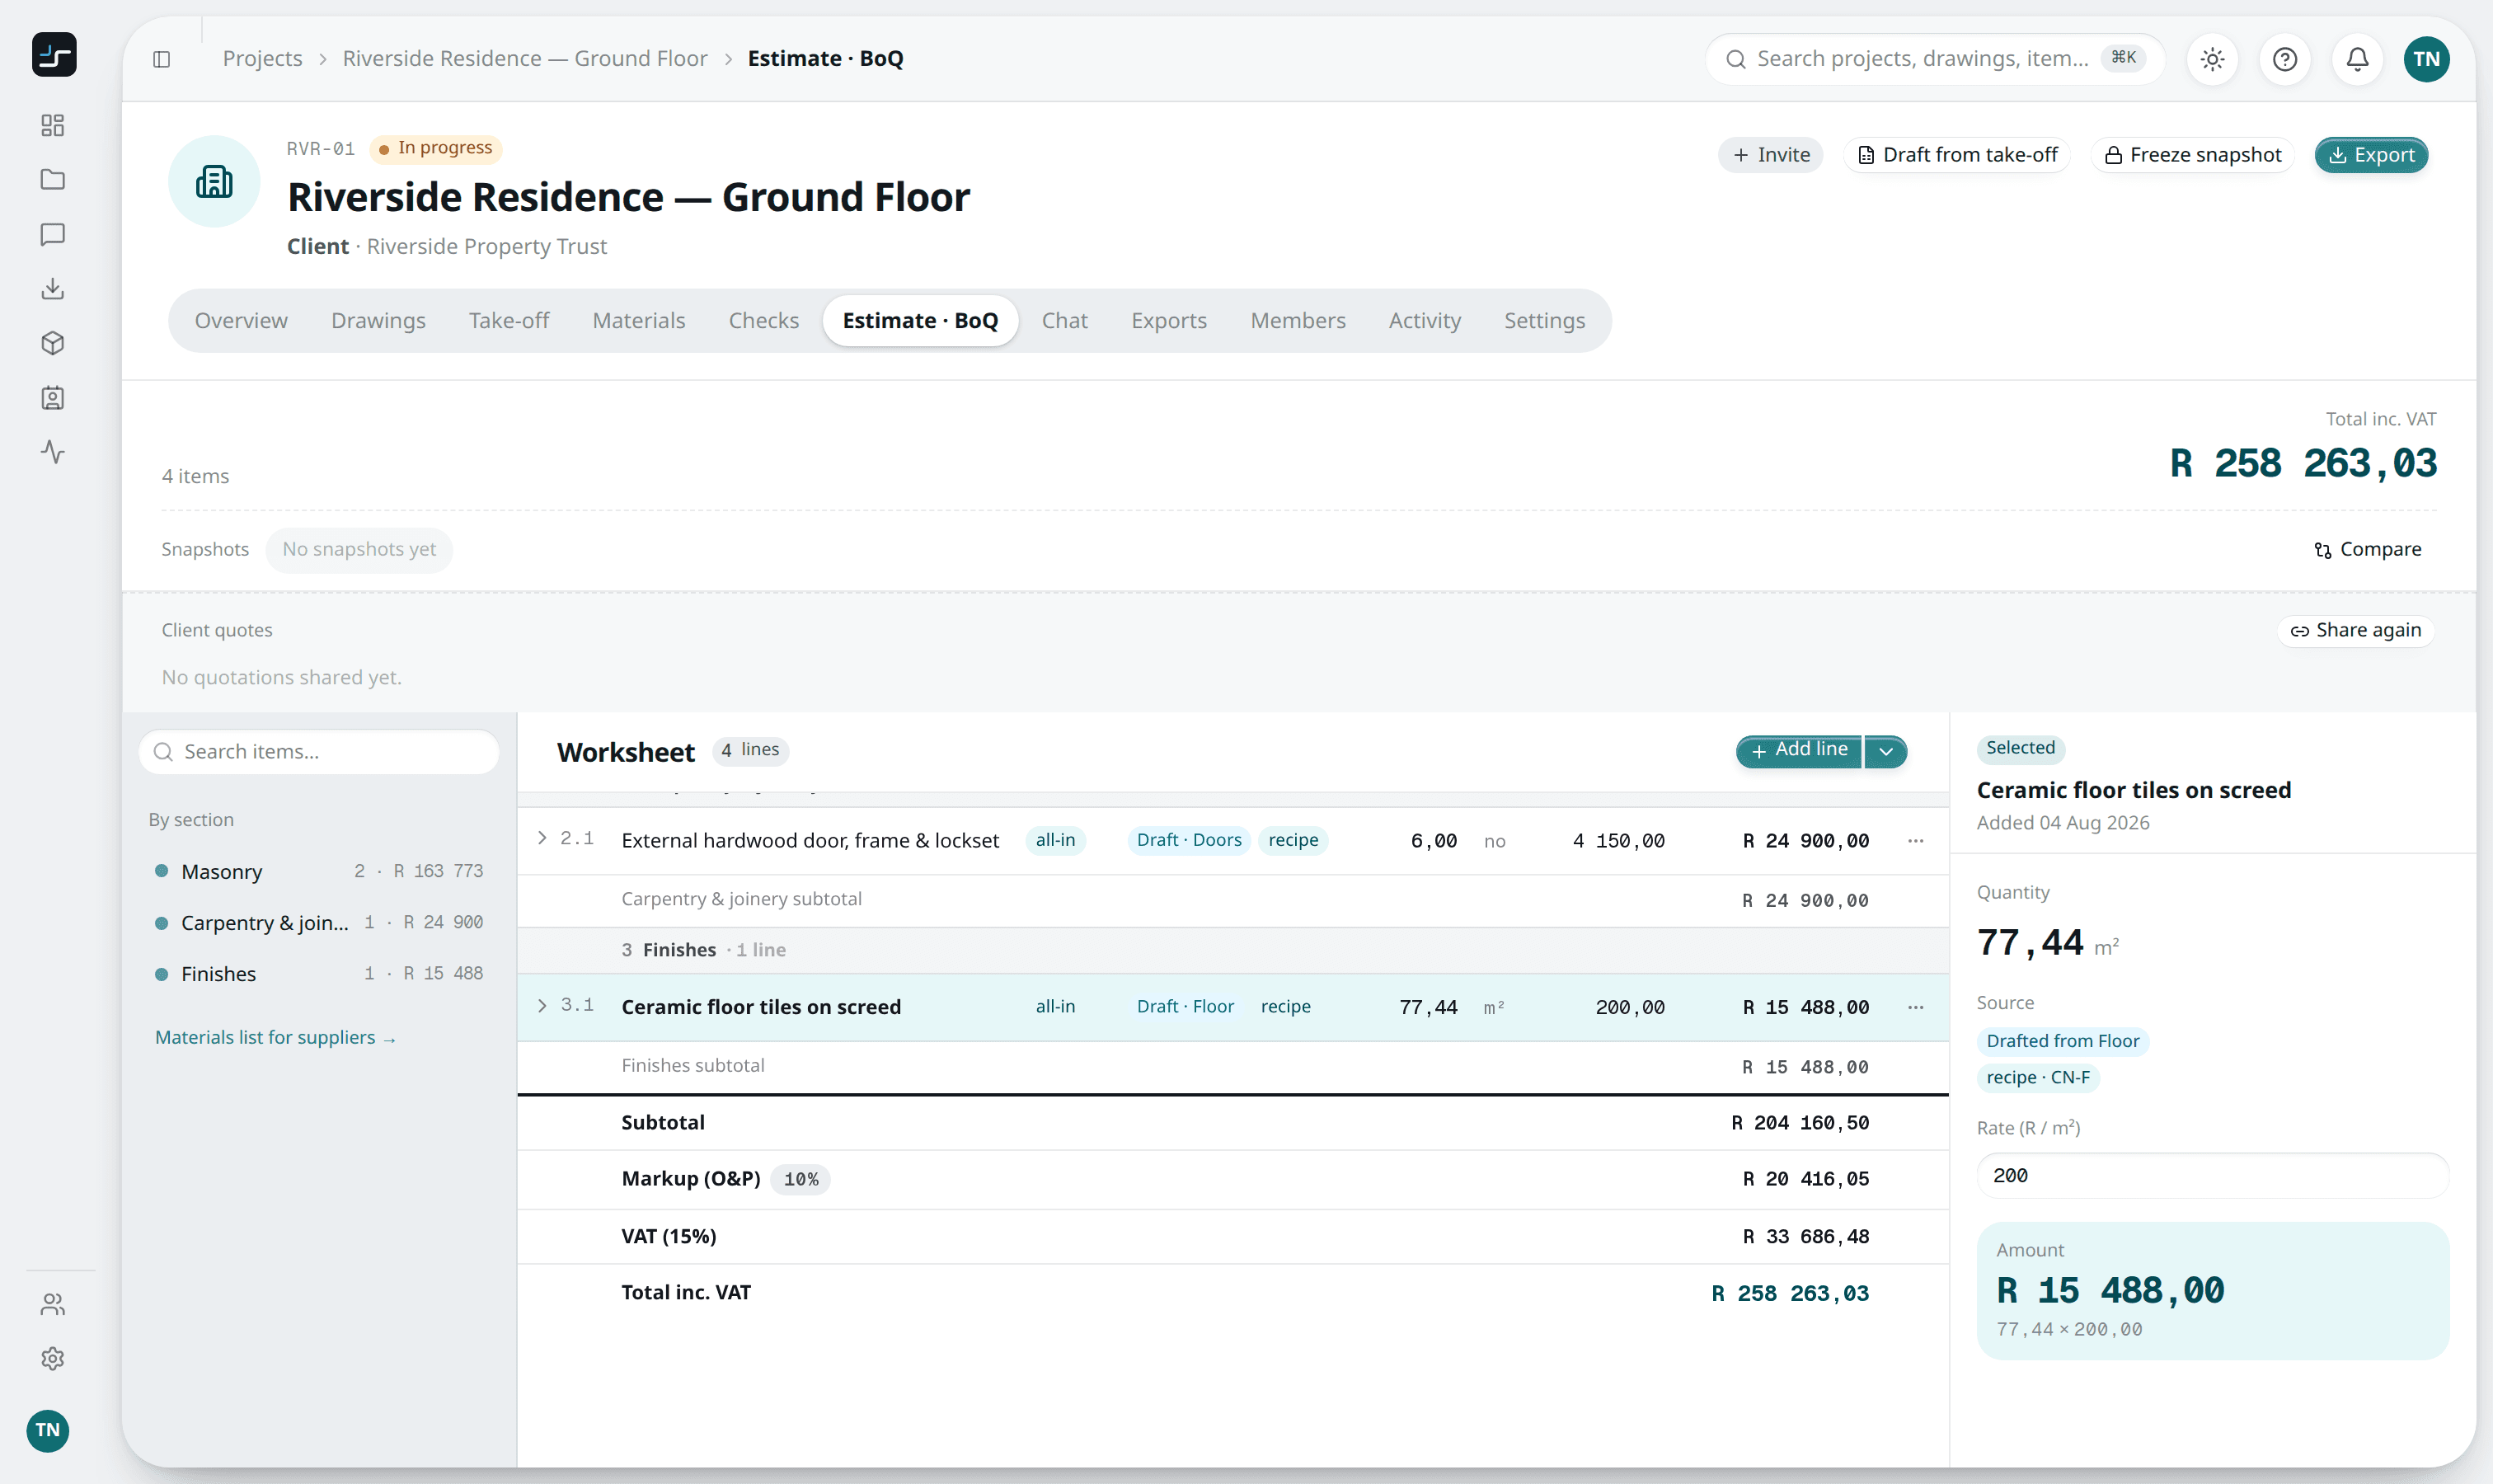
- The Estimate · BoQ tab is the priced bill: ASAQS sections (preliminaries, measured work, provisional sums and more), your markup and VAT, in rands. You can freeze a snapshot to lock a version.
- Exports send the finished bill out as CSV, Excel or PDF — including an ASAQS BoQ template plus Xero, Sage, Procore and a measurements register.
For more on the output, read The ASAQS bill of quantities, explained. Still untangling the two halves of the job? See Take-off vs estimating.